Now, this project is not for the weak of heart, the stingy of hot glue, or the newlyweds who are still manic about every wedding-related item. You have been forewarned.
With my one-year anniversary fast approaching, I find myself thinking more and more about my wedding. This inevitably lead to me going through some of the extra wedding items. The things that
didn't turn into utensil holders and sun catchers got stashed in boxes and placed in our second bedroom/crafts room/library.
One of the boxes holds all the extra invites and RSVP cards, while another holds all the returned RSVP cards. And they just kind of hang out there -- and have been for almost a year. I decided that, instead of letting them be shelved away in a box, collecting dust, I'd do something with them.
This project can easily be done with regular paper, cardstock, or pages from a book (some of my favorite "paper flowers" projects call for book pages). I decided, for a slew of reasons to use old RSVP cards.
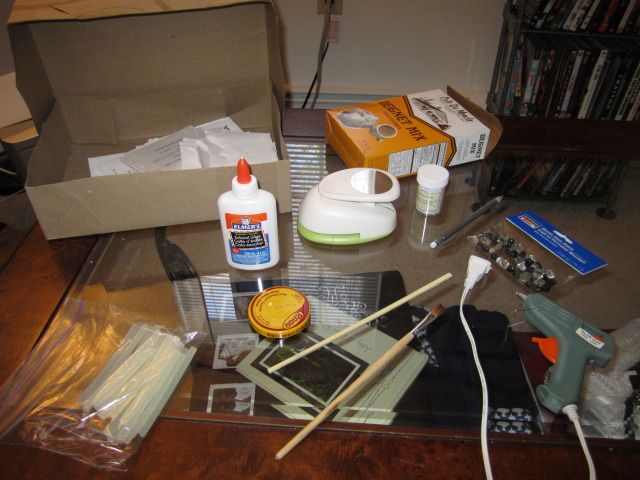
For this project, I got out: the big box of RSVP cards, cardboard, a jar lid, a large circle puncher, glue gun, "swizzle stick" (technically an unused wooden chopstick), glass marbles, yarn, push pins, rose beads.
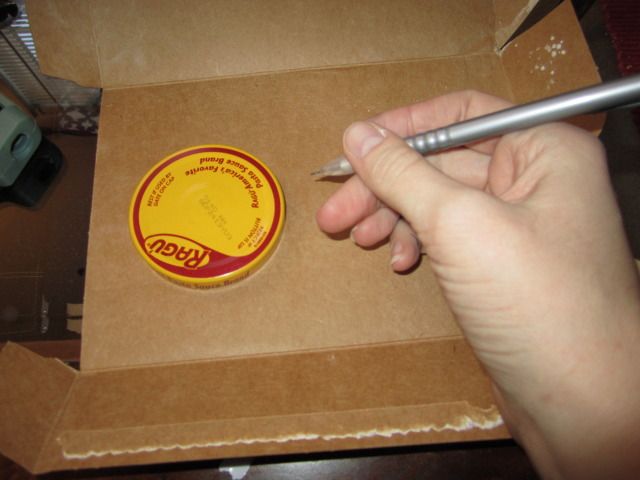
First, I traced 18 circles in the cardboard to serve as the bases of the flowers. Yes, 18 circles. You can do however many you want. Maybe you just want to do one flower. In fact, one or two flowers would look adorable. I know I wish I only did one by about, say, flower #12.
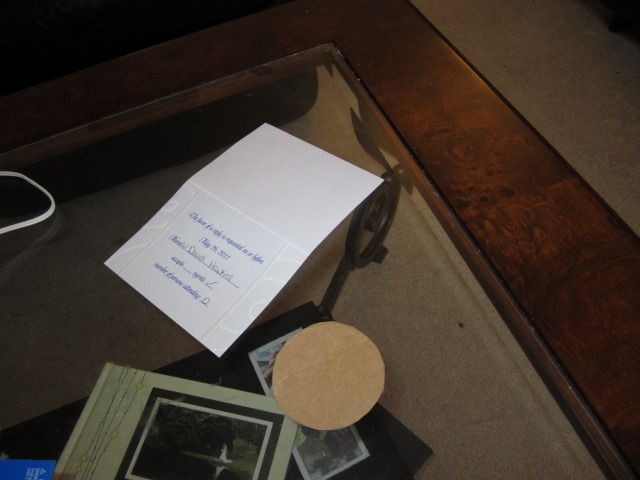
I then used my circular puncher and punched out the circles. Lots, and lots, and lots of circles. Since my RSVP cards had this really nice border on the edge, I paid close attention to said edges to make sure I got them when punching out my circles.
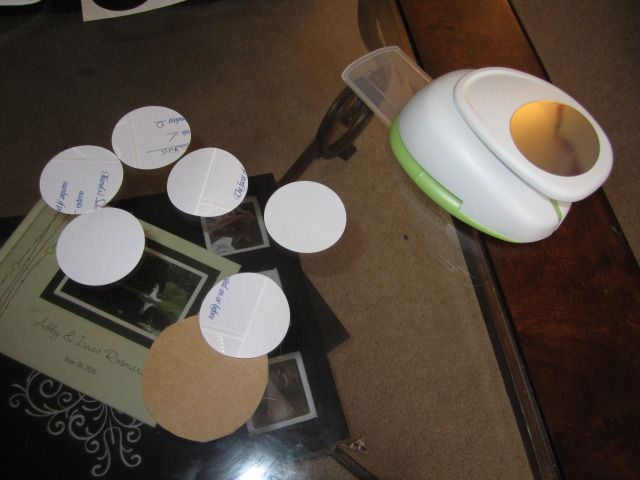
To give you an idea as to how many circles you'll punch out: each flower uses about 13-15 circles. 18 x 15 = 270. This is why I recommend a circle punch instead of manually tracing and cutting out circles. You will drive yourself mad.
Now, to my newly-married, if you're ready, I want you to repeat this mantra: not every detail of the wedding needs to be inshrined. Again: not every detail of the wedding needs to be inshrined. I say this because my husband saw my project and noted that he'd never thought he'd see the day where I would willingly cut up RSVP cards.
And like the calm, rational woman that I am, I reacted by doubting everything I was doing and bursting into tears.
After I calmed down, I immediately remembered why I'm so glad I'm good and married and done with the wedding planning process: wedding plans can take all types of girls, even girls like me -- girls who never really "envisioned" their wedding, or really even had "get married" as a goal in life -- and turns them into overly-emotional wrecks who need to be coddled like a nineteenth century woman suffering from hysteria.
Something to remember when I find myself waxing poetic about the joys of venue hunting.
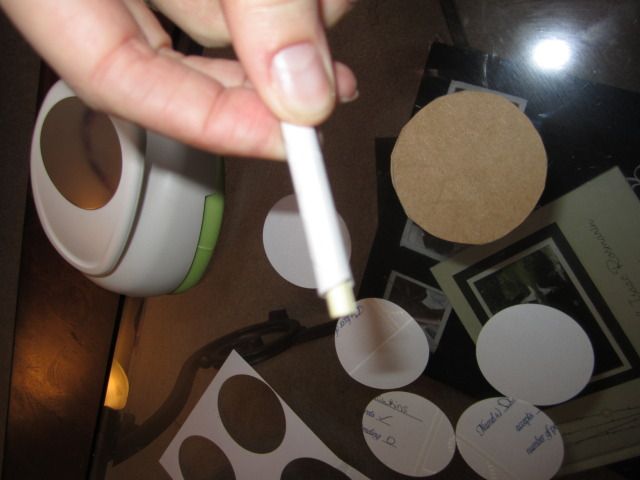
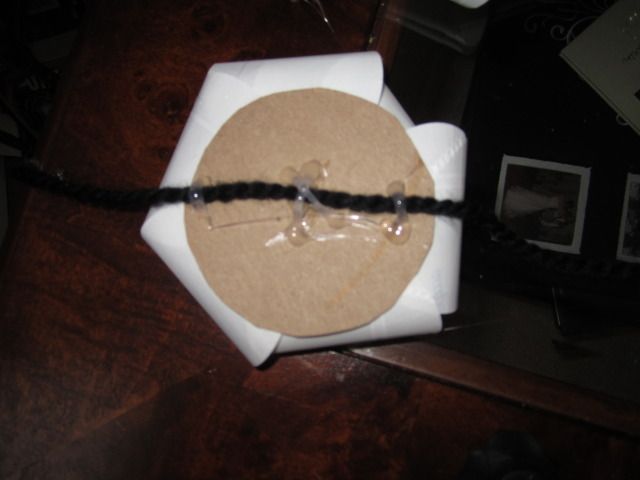
Next I tightly wrapped each circle around the unused chopstick that I relabeled swizzle stick. I slid the circle off and placed to the side.
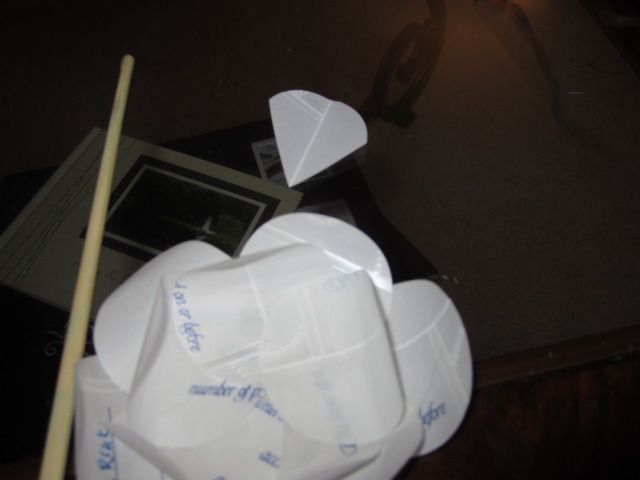
Either flower will need about 3 or 4 "center" circles. These circles will need to be cut in order to fit in the center. I simply cut two sides into an un-swizzled circle so that it looks a bit like an ice cream cone. Then, I swizzled away.

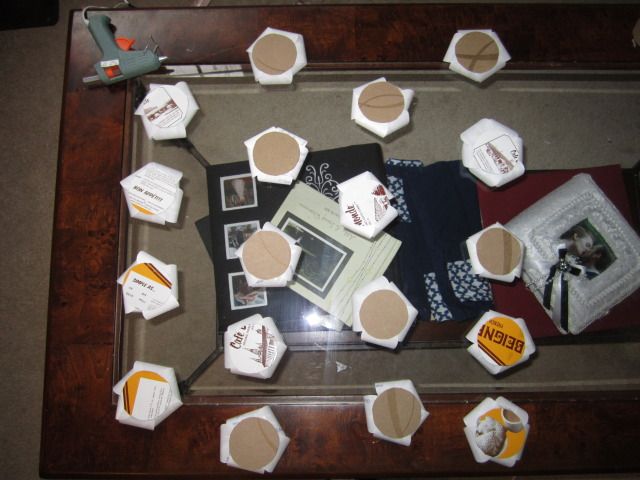
Starting with the outer layer of the cardboard circle, I hot glued 5 or 6 of the swizzled circles. Once the glue has cooled, I glued roughly 4 or 5 circles in the inner layer, and 3 or 4 ice cream cones/"center circles".
Place a solid dollop of hot glue in the center and place your glass marble. I went for the jagged glass rocks, partly because they didn't have any flat, clear marbles at Michael's, and partly because I liked the idea of having the center be multi-colored (and by "multi-colored", I mean a duo of the two non-colors: black and white).
If you are like me, after you made your 18 flowers: just hang out. Watch some TV. Go running. I spent about 2 hours making these flowers. Granted, it was on the weekend after an exceptionally stressful week (although, sometimes it feels like every week is an exceptionally stressful week), and I needed that monotonous behavior to reset my weary brain. But that didn't change the fact that I was seeing stars by the end.
The next day, I went at the next portion: the hanging portion! This is where the yarn, push pins, and rose beads came in.
I got these amazing black rose beads from
Natalia's Beads & Crafts. I only needed five and they came in a set of six. Since I'm always making jewelry, I decided to save the sixth one for a future project.
I first arranged the flowers how I would want them hanging out, only face-down. I wanted five rows, with alternating four flowers, three flowers in each. Make sure the flowers are the right distances away from their row companions.
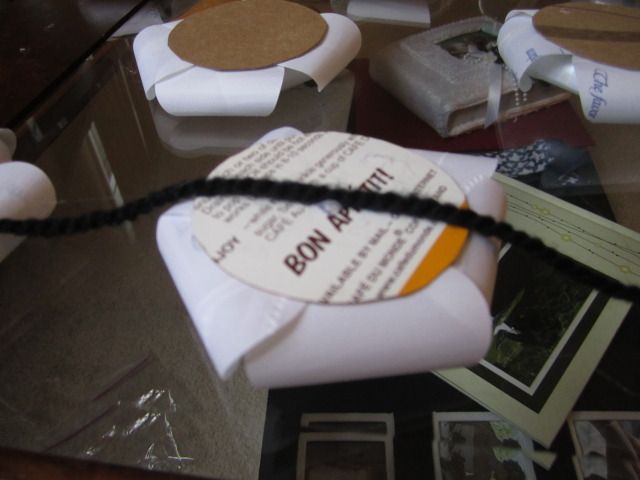
Next, I cut five very long strands of black yarn and placed them on top of the flowers. To hot glue them in place, I moved the string to the side, placed a healthy dollop of hot glue in the center, and, holding the string taught, I gently pushed the string down on the dollop, twisting it just enough to that the glue covered the entire string.
Afterward, I decided one dollop wasn't enough. I then made a criss-cross over the string, as well as a loop on either end of the flower.

After every flower was glued onto the string, I hot glued the beads onto the tops of the push pins. I lucked out in that the beads had flat bottoms (heh, flat bottoms) and I could place the beads face down. This made the gluing
immensely easy. I placed a dollop of glue on the bottoms of the beads and simultaneously pressed and twisted the tops of the push pins into the glue.

When everything cooled, I evened out the yarn lengths and tied the ends of the yarn to the body of the push pin. I suggest multiple wrappings and knottings, so that you cannot see the color of the push pin.
Then, I simply pressed the push pins into the wall roughly 6 inches from each other and twisted around the yarn to that every rose is facing out (they won't naturally want to this).
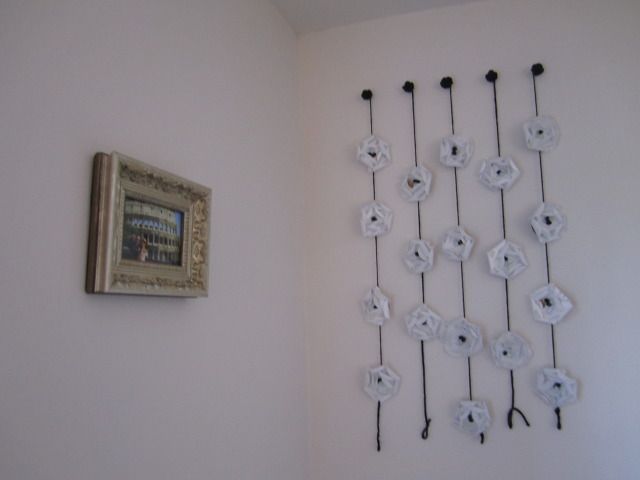
This was a long, arduous journey, but I'm happy with the result. However, I think I'm going to let the rest of my excess wedding paraphernalia hang out in said boxes. It's not worth awakening the beast that is the overly-sensitive bride-to-be!
No comments:
Post a Comment